chris@alfredturbo.com
+86-18112348562
Language
Please Choose Your Language

Views: 0 Author: Alfredturbo Publish Time: 2026-07-17 Origin: Site


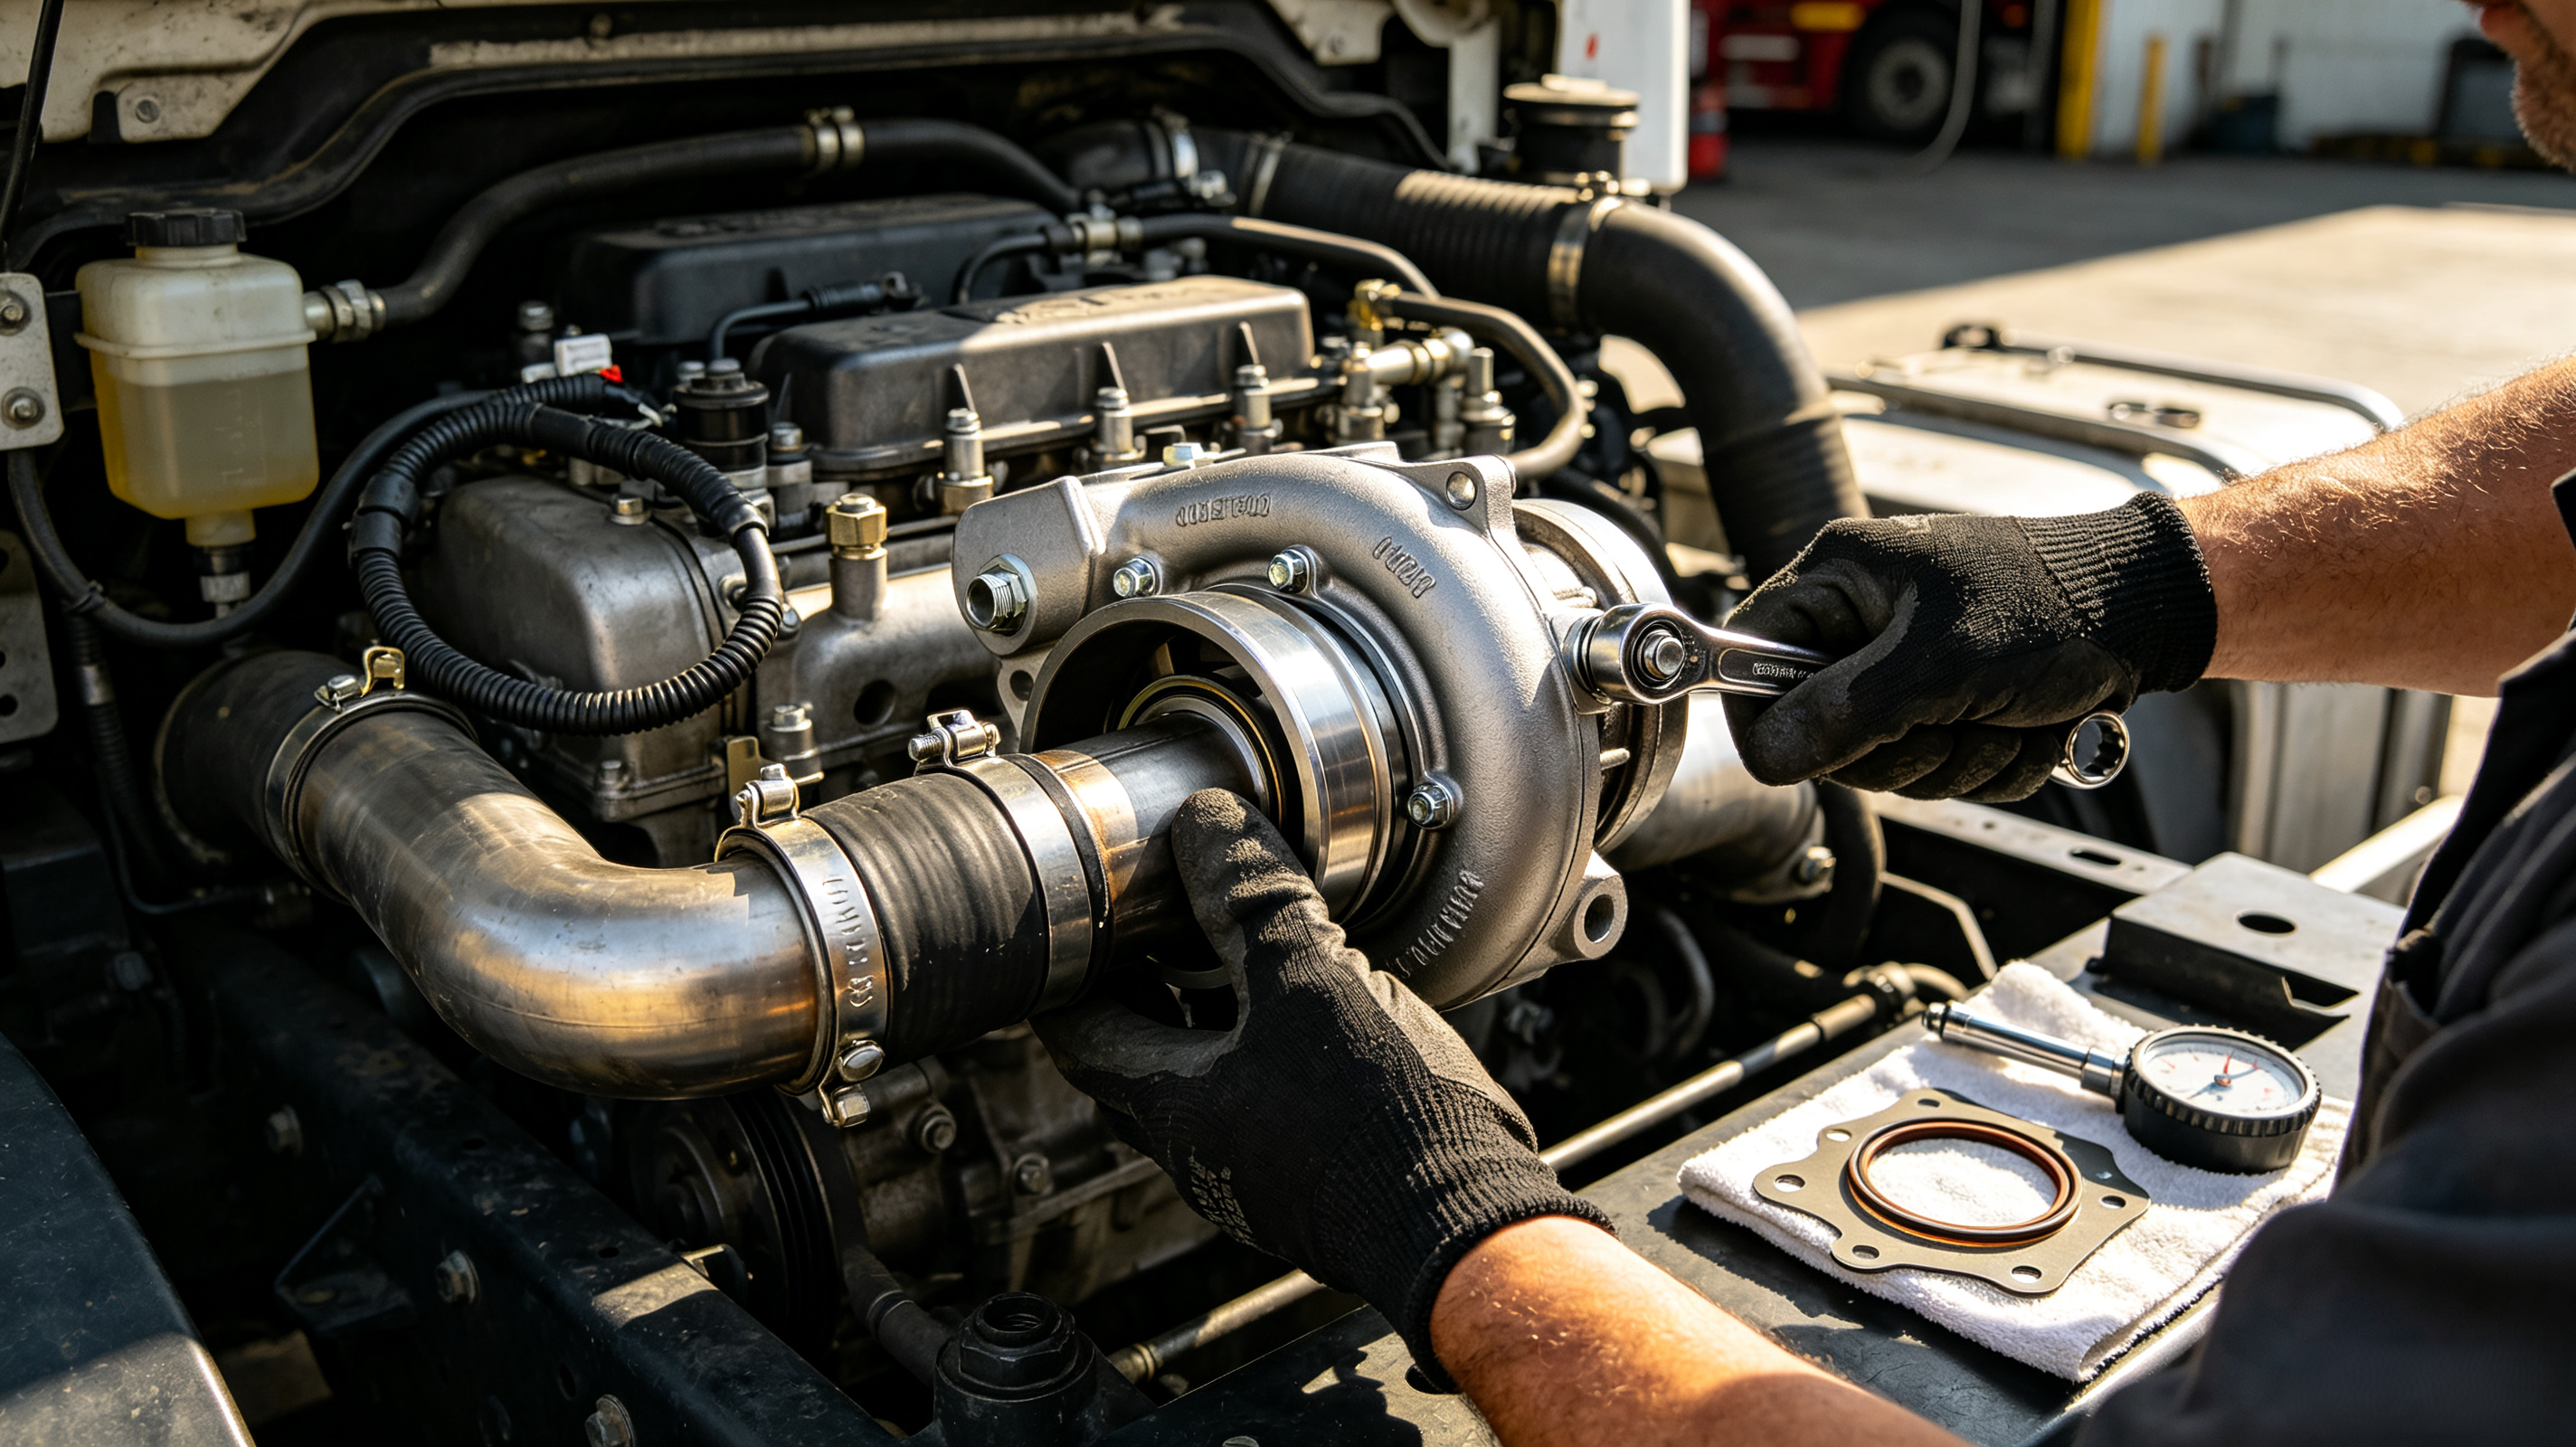
Countless truck repair technicians, fleet mechanics and auto parts dealers have encountered the same frustrating issue: after fitting a brand-new genuine turbocharger, the vehicle develops blue smoke, oil leaks, insufficient power within just a few hundred kilometers, or even suffers damaged impellers and seized bearings. Most people instinctively assume the product is defective. However, as an original manufacturer specializing in turbocharger production and export with access to massive global overseas repair cases, we can clearly state this: 90% of premature failures of new turbochargers stem not from inherent product defects, but from human error caused by non-standard installation procedures.
Replacing a truck turbocharger is far more than simply removing the old unit, fitting a new one and tightening bolts. As the core precision component of a diesel engine with the highest rotational speed, the turbocharger’s internal rotor spins at hundreds of thousands of revolutions per second. It demands extremely strict standards for lubrication, alignment and pipeline matching. Even minor oversights during operation can render a brand-new turbocharger completely unusable.
Today, we break down the full standardized installation process, focusing on two core pain points: turbocharger body alignment and lubrication system matching. This guide helps avoid common industry installation pitfalls. Following these practical steps will drastically cut turbocharger failure and return rates, and apply to retrofits and replacements for all light, medium and heavy-duty diesel trucks.
Most technicians make the same critical mistake when replacing turbochargers: they buy a new unit and install it directly without identifying the root cause of the original turbocharger’s failure. If the underlying issue remains unresolved, even top-quality new turbochargers will break down rapidly after fitting. Therefore, diagnosing the source of the original fault, inspecting the new component, and servicing oil and air pipelines are foundational steps more vital than the installation itself.
Do not discard the disassembled old turbocharger immediately. A simple visual inspection of the used unit allows you to accurately locate the fault source, fundamentally preventing the new turbocharger from suffering the same damage and saving exorbitant repair costs.
Blue discoloration on the turbocharger rotor shaft, burnt bearings or stiff rotation signals typical lubrication failure. This is most often caused by contaminated engine oil, blocked oil galleries, failed oil filters or insufficient oil pump supply. The entire lubrication circuit must be thoroughly cleaned, and all engine oil and filter elements replaced. Never install a new turbocharger without completing these steps.
Pitting, notches or abrasion marks on the compressor impeller almost always indicate a damaged air filter or poor sealing in the air intake system. Sand and debris are drawn into the turbocharger and strike the impeller at high speed, causing damage. In such cases, fit a brand-new air filter and fully purge all contaminants from the intake pipes.
Severe carbon buildup on turbocharger vanes or seized VGT variable geometry mechanisms are mainly triggered by excessive engine exhaust backpressure, blocked DPF particulate filters or inaccurate fuel injection data leading to abnormal exhaust conditions. Bent wastegate rods and deformed actuators usually result from rough disassembly practices over time or sustained excessively high exhaust temperatures.
As an export manufacturer, we observe that many installation accidents arise from skipping new component inspection upon delivery. Careless errors such as incorrect model fitting, installing defective units or failing to remove protective plugs often render new turbochargers irreparable right after mounting.
Do not judge compatibility solely by external appearance. Strictly cross-check the model number on the turbocharger nameplate, matching engine model, A/R ratio and flange mounting orientation to ensure full alignment with the vehicle’s original specifications. Mismatched parameters will lead to poor power output and misaligned pipeline connections.
Gently turn the compressor impeller by hand. Proper function means smooth rotation with no stiffness or metal scraping noises against the housing. If the impeller turns sluggishly or produces grinding sounds, the unit sustained damage during production or transit and must not be installed. Additionally, remove all plastic protective plugs covering the turbocharger’s intake and exhaust ports — this easily overlooked step prevents catastrophic impeller collision damage.
Inspect the turbocharger center housing for oil seepage sustained during shipping, and cross-check the full accessory kit. All gaskets, O-rings, hose clamps and sealing materials must be present. Refit or replace any missing or damaged parts; never proceed with incomplete accessories.
Failure of the original turbocharger is almost always accompanied by aging and contaminated fluid circuits and pipelines. Complete servicing of oil and air lines before fitting the new turbocharger is a core prerequisite for long-term reliable operation, and forms part of our standardized construction checklist provided to overseas export clients.
Drain all old engine oil while the engine is hot; cold draining leaves sludge and impurities trapped within oil galleries. Install a brand-new oil filter, and pre-fill the new filter with clean engine oil before mounting. This establishes initial lubrication and eliminates dry startup wear.
Fit a brand-new air filter by default. Use compressed air to fully blow carbon deposits and debris from intake pipes and intercooler lines. If the old turbocharger exhibited severe oil blow-by, disassemble and flush the intercooler to stop residual oil and contaminants from damaging the new turbocharger.
Disassemble the turbocharger oil supply and return lines, and inspect interiors for sludge and blocked internal strainers. Replace any bent, aged or obstructed pipes outright — makeshift repairs are unacceptable. Remove rust and leftover gasket residue from exhaust flange surfaces; mill and repair severely warped flanges to eliminate high-temperature exhaust leaks.

Mounting the turbocharger body is the most critical stage of the entire process. 90% of premature turbocharger failures occur due to misaligned housings, skipped pre-lubrication and improper sealing procedures. Truck turbochargers consist of three core sections: the hot exhaust turbine end, the center housing (oil-lubricated bearing chamber), and the cold compressor intake end. Housings ship from the factory at a universal angle, which must be adjusted to match each vehicle model with strict operational standards.
Scraping noises, stiffness and impeller housing contact immediately after installation stem almost entirely from misaligned housing angles. Uneven stress distribution causes internal component friction and permanent damage.
Hang the turbocharger hot-end housing onto the exhaust flange using two loose temporary bolts without full tightening to retain adjustability. Rotate the center housing to calibrate the oil return port, which must face vertically downward with a maximum allowable offset of 20°–35°. Excessive angular deviation restricts oil drainage, resulting in blue smoke at idle and oil leakage.
Adjust the compressor cold-end housing angle so the outlet port perfectly aligns with the intercooler pipe without offset or tension. Once calibrated, secure bolts connecting the center housing, compressor housing and V-band clamps using a diagonal incremental tightening sequence, adhering strictly to OEM specified torque values. Never over-tighten with brute force. Insufficient torque causes air and oil leaks plus housing movement; excessive torque warps housings and triggers impeller housing rub.
Brand-new turbocharger bearing assemblies have no residual oil film. Cranking the engine immediately causes catastrophic high-speed dry wear that damages bearings instantly and drastically shortens service life. Pre-lubrication is an indispensable procedure.
Disconnect the turbocharger oil supply line temporarily. Pour clean CI-4 / CH-4 or higher grade diesel engine oil into the oil inlet port on the center housing. While adding oil, slowly rotate the compressor impeller by hand to distribute oil evenly across floating bearings, thrust bearings and all rotating internal components, forming a complete protective oil film layer.
Continue pouring oil and turning the rotor until consistent oil drips from the return port and the rotor turns with noticeable viscous oil film resistance, confirming full lubrication. Reconnect the oil supply line afterward. Apply a small amount of high-temperature anti-seize compound to threaded connections. Never use liquid thread sealant on oil supply ports: carbonized sealant debris at high temperatures blocks oil galleries and abrades bearings, leading to total turbocharger failure.
Turbocharger sealing appears simple yet is the top source of oil and air leak faults. Follow these three prohibitive principles to eliminate installation risks at the source:
1. Do not reuse old gaskets: Replace all exhaust gaskets, oil return gaskets and O-rings with brand-new components. Aged, deformed used gaskets cannot maintain effective sealing and will inevitably leak.
2. Do not apply liquid thread sealant: Flange sealing relies on metal gaskets and correct torque only. Sealant is unnecessary and risks hardened fragments blocking oil and air passages.
3. Do not force pipelines into alignment: If pipes do not naturally align with the turbocharger, readjust the housing angle instead of pulling pipelines hard. Forced lateral tension creates rotor eccentricity and housing rub.
Pneumatic wastegate turbochargers ship with factory-calibrated boost pressure parameters. Never bend linkage rods with pliers or arbitrarily adjust screw threads. If the original turbocharger failed due to a seized wastegate, connect vacuum and pressure signal lines after mounting the new unit to test smooth valve opening and closing, calibrating strictly to OEM specifications. Avoid blind adjustments based on subjective feel, which cause abnormal boost pressure and power loss.
Many repair technicians attribute turbocharger oil blow-by and leakage to defective turbocharger units, yet 80% of such faults originate from non-standard oil return line installation. Turbocharger lubrication operates on pressurized oil supply and gravity-driven oil return. Improper pipeline gradient, inner diameter and mounting configuration will ruin even premium turbochargers.
Use supply lines with factory-specified standard inner diameters; avoid narrow tubing and excessive elbow joints that create flow resistance. Do not add aftermarket inline strainers to factory supply lines lacking built-in filtration, as these easily restrict oil delivery and lead to burnt bearings from insufficient lubrication. After connecting the supply line, crank the engine manually without ignition to verify leak-free flanges and smooth oil flow.
Turbocharger oil return relies solely on natural gravity with no auxiliary suction, making line installation paramount. The oil return pipe inner diameter must match or exceed the turbocharger return port size; pipes with a 16 mm minimum inner diameter are recommended for fast drainage. Route the entire line on a continuous downward slope, eliminating U-shaped or upward sagging bends that trap accumulated oil and cause blockages.
Additionally, the return pipe outlet inserted into the oil sump must sit above the engine oil level. Excessive crankcase pressure will force oil back into the turbocharger center housing and trigger dual-end fluid leakage. Double-check return flange gaskets to ensure full alignment of all port holes; offset gaskets partially blocking oil passages restrict drainage and create blue smoke during cold starts.
Tiny contaminants striking high-speed impellers act like high-velocity projectiles, instantly destroying vanes and rendering the turbocharger useless. Block all pipeline openings with clean rags during refitting to stop nuts, rubber strips, wire and dust from falling inside. Blow all pipelines thoroughly with compressed air again before final connection to confirm zero residual debris.
After securing all intake, exhaust and intercooler hose clamps, pull each pipeline firmly by hand to confirm no tension, strain or loose connections. Loose piping can detach or leak during high-speed driving, while persistent pipeline stress warps the turbocharger housing.

Standardized installation forms only the foundation. Correct initial startup testing, early break-in and regular maintenance directly governturbocharger lifespan and operational stability. Most premature turbocharger failures occur due to improper startup and break-in procedures.
Once all pipelines and components are fitted, do not ignite the engine immediately. Disconnect the fuel injection relay or fuel shutoff solenoid, then engage the starter motor to crank the engine without combustion. Continue cranking until the oil pressure gauge registers a stable reading, confirming oil circulates fully through turbocharger galleries and coats bearings. Reconnect the fuel supply and ignite the engine only after this step to eliminate dry wear during initial ignition.
After ignition, maintain idle speed for 3–5 minutes and avoid depressing the accelerator to raise RPM at all costs. Check three critical fault risks during idle: oil dripping at turbocharger supply and return flanges, hissing exhaust air leaks from intake/exhaust pipelines, and metal scraping or binding noises from the turbocharger. Mild operational hum is normal for new units; shut down the engine immediately if housing rub or stiff rotation sounds occur for troubleshooting.
The first 50–100 kilometers of driving form the critical turbocharger break-in phase. Avoid full-throttle acceleration, heavy-load hill climbing and sustained high RPM operation. Gradually increase vehicle speed and engine RPM to allow stable bearing oil film formation and full component seating. Excessive load during break-in causes premature new turbocharger damage. Once break-in is complete, stop the vehicle to recheck all bolts and hose clamps, retightening minor loosening caused by thermal expansion and contraction.
Allow the engine to idle for 30 seconds to 1 minute after cold startup, waiting for full oil circulation and stable bearing oil film before driving. After long-distance highway travel or heavy-load operation, do not shut the engine off instantly. Maintain idle speed for 3–5 minutes to enable continuous oil and coolant circulation that dissipates residual turbocharger heat, preventing carbon buildup on rotors and seized bearings from retained high temperatures.
Replace genuine engine oil, oil filters and air filters every 8,000–10,000 kilometers based on vehicle operating conditions. Regularly monitor engine oil consumption, measure turbocharger radial clearances and inspect intake system sealing integrity. Promptly remove carbon deposits and resolve pipeline hazards to prevent 90% of common turbocharger faults through consistent routine maintenance.
As an original factory focused on turbocharger R&D, production and export, our products ship to countries worldwide and fit all heavy-duty, light-duty trucks and construction machinery diesel engines. Every turbocharger leaving our factory undergoes high-precision dynamic balance testing, pressure sealing testing and high-low temperature durability testing, eliminating factory-originated defects including unbalanced impellers, fluid leakage and housing deformation from the source.
We uphold one core principle: premium turbocharger products paired with standardized installation processes deliver optimal power performance and extended service life. Turbochargers themselves are not fragile — their delicate bearings and rotors spinning at hundreds of thousands of RPM demand careful handling. Master three core links: installation alignment, lubrication and break-in, and you can permanently eliminate recurring turbocharger failures and repeated repair work.
Replacing a truck turbocharger is never a simple disassembly and fitting task, but a refined standardized workflow. Six indispensable stages must be completed in sequence: diagnose original fault root causes, fully inspect new components, calibrate housing alignment, perform mandatory pre-lubrication, route pipelines with correct drainage gradients, and conduct scientific startup break-in. For repair industry practitioners, standardized operations reduce rework and component waste. For export wholesale clients, consistent installation procedures cut after-sales costs and strengthen market reputation.
If you require support with turbocharger model selection, installation commissioning, fault diagnosis, or high-quality fully compatible turbocharger bulk export supply, feel free to contact us anytime. Drawing on our original factory quality edge and professional technical service team, we deliver cost-effective integrated turbocharger solutions to global clients.